Protect Your Stone: Why Professional Cleaning Is a Must for Limestone!

Natural limestone tiles are a stunning addition to any home or business, offering timeless elegance and durability. However, like any natural stone, limestone requires regular maintenance to preserve its beauty and functionality. While routine cleaning can handle day-to-day dirt, professional cleaning is essential for deep cleaning, restoration, and long-term care.

Why Limestone Needs Professional Cleaning

Limestone is a porous and delicate material, which makes it more susceptible to:

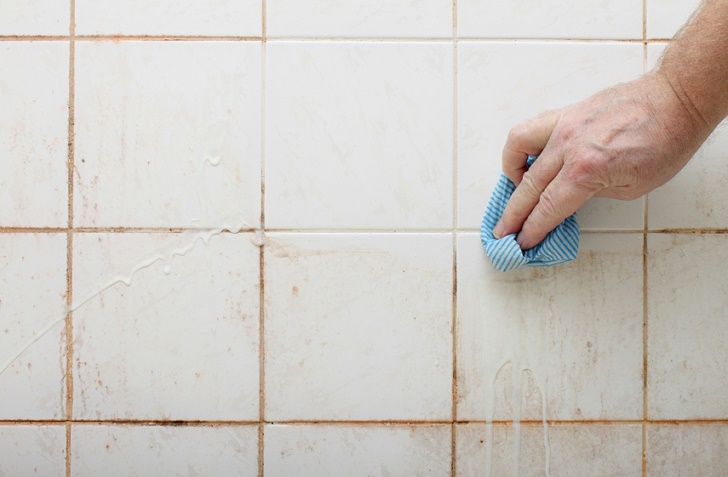
  • Stains: Liquids like wine, coffee, and oils can penetrate its surface and leave permanent marks.
  • Etching: Acidic substances such as vinegar, lemon juice, or harsh cleaners can dull its finish.
  • Wear and Tear: High foot traffic can cause scratches, dulling, and uneven surfaces.
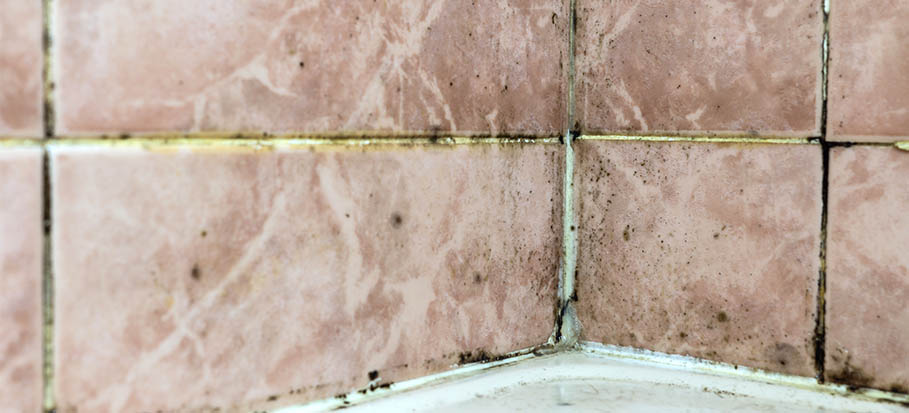
  • Mold and Mildew: Moisture retention can lead to mold growth, particularly in humid environments like bathrooms or kitchens.

Professional cleaning addresses these issues more effectively than DIY methods, ensuring your limestone stays in top condition.

Benefits of Professional Limestone Cleaning

1. Deep Cleaning

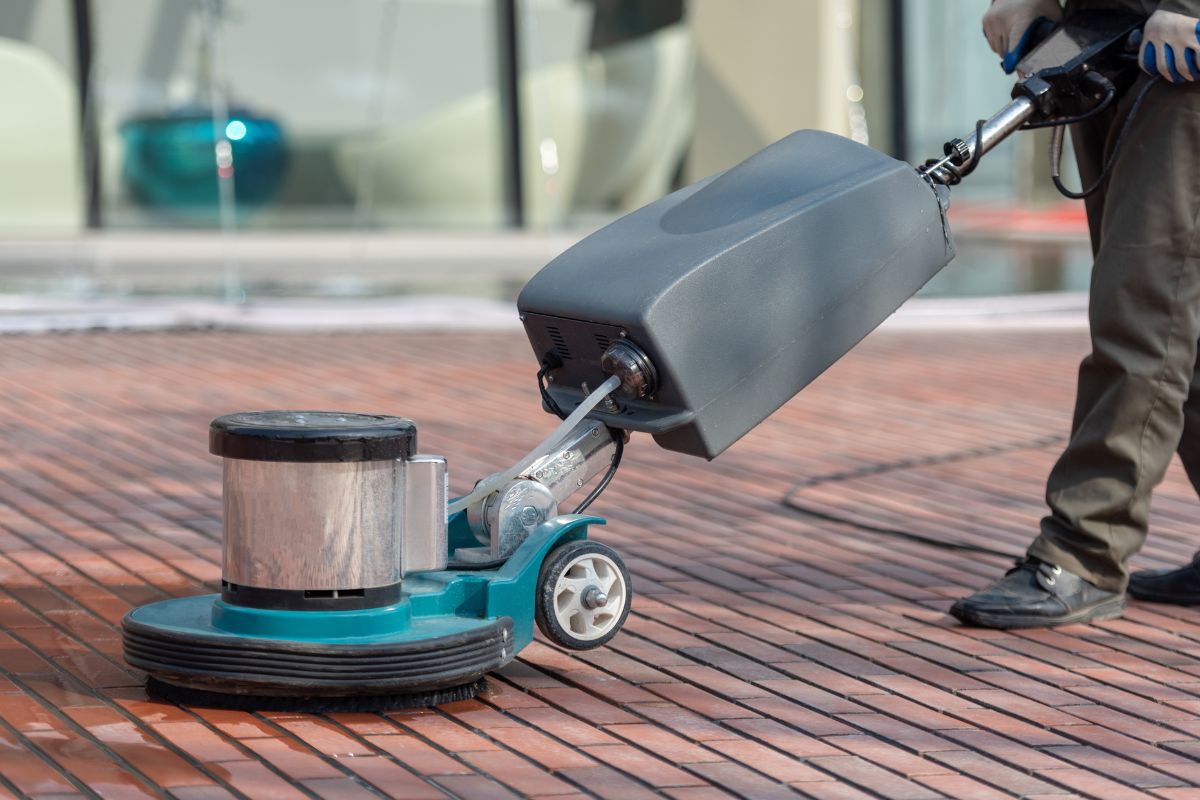
  • Professional cleaners use specialized equipment and products designed specifically for natural stone.
  • These tools penetrate deep into the stone’s pores, removing embedded dirt, grime, and bacteria that regular mopping can’t reach.

2. Stain Removal

  • Tough stains, such as oil and wine, require advanced techniques to lift them without damaging the stone.
  • Professional services like the Best Tile Cleaning Service can effectively remove stubborn marks while preserving the stone’s integrity.

3. Prevents Damage

  • Incorrect cleaning techniques, such as using acidic or abrasive products, can cause irreversible damage to limestone.
  • Professionals have the expertise to choose the right methods and products for your specific stone type.

4. Restores Shine

  • Over time, limestone can lose its natural luster due to wear and tear.
  • Professional polishing and buffing bring back its original shine, enhancing its aesthetic appeal.

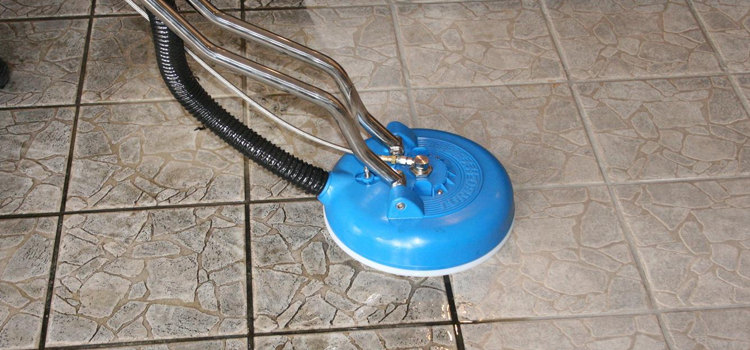
5. Grout Cleaning and Restoration

  • Dirty or discolored grout can ruin the overall look of your limestone tiles.
  • Professional cleaners restore grout lines, removing dirt and mildew while preserving the surrounding stone.

6. Sealing for Long-Term Protection

  • After cleaning, professionals apply a high-quality sealer to protect the limestone from future stains, moisture, and damage.
  • Sealing also makes routine maintenance easier and more effective.

Signs Your Limestone Needs Professional Cleaning

If you notice any of the following, it’s time to call in the experts:

  • Dull Appearance: The stone no longer has its original shine, even after cleaning.
  • Stubborn Stains: Spills or marks that won’t come off with regular cleaning.
  • Etching: Dull spots or areas caused by acidic substances.
  • Uneven Surface: Wear patterns from foot traffic or improper cleaning techniques.
  • Mold or Mildew: Dark spots or growth in grout lines or on the stone surface.

Professional Cleaning Techniques for Limestone

Professionals use various methods to clean and restore limestone, depending on its condition:

1. pH-Neutral Cleaners

  • These are gentle yet effective at removing dirt and grime without damaging the stone.

2. Steam Cleaning

  • High-temperature steam is used to sanitize and deep-clean the surface, removing bacteria and dirt embedded in pores.

3. Polishing

  • A mechanical process that smooths the surface and restores its shine, eliminating scratches and dull spots.

4. Sealing

  • Applying a protective sealant prevents stains, moisture, and dirt from penetrating the limestone.

5. Grout Restoration

  • Grout lines are cleaned and resealed to enhance the overall appearance and durability of the tiles.

DIY vs. Professional Cleaning: What’s the Difference?

While regular cleaning can maintain your limestone on a daily basis, professional cleaning provides:

  • Advanced Tools: Professionals use high-grade equipment for thorough cleaning and polishing.
  • Expertise: They understand the unique properties of limestone and know the best techniques to preserve it.
  • Long-Lasting Results: Professional cleaning and sealing ensure your limestone stays protected for months or even years.

How to Maintain Limestone Between Professional Cleanings

  1. Use Mats and Rugs
    • Place mats at entryways to reduce dirt and grit from being tracked onto limestone floors.
  2. Wipe Spills Immediately
    • Prevent stains by cleaning spills as soon as they occur.
  3. Clean with pH-Neutral Products
    • Avoid harsh or acidic cleaners that can etch the stone.
  4. Dust and Mop Regularly
    • Use a microfiber mop to remove dust and debris without scratching the surface.
  5. Reapply Sealant Annually
    • Keep your limestone protected by resealing it every 12 months or as recommended by professionals.

When to Hire Professional Tile Cleaning Services

While regular maintenance is essential, professional tile cleaning services are necessary for:

  • Deep cleaning and stain removal.
  • Restoring a dull or scratched surface.
  • Treating mold and mildew in high-moisture areas.
  • Protecting and sealing the stone for long-term durability.

For reliable and effective care, trust experts offering the Best Tile Cleaning Service to handle your limestone with precision and care. Whether indoors or outdoors, our Outdoor Tile Cleaning Canberra specialists ensure a spotless and long-lasting finish.

Conclusion

Natural limestone tiles are a beautiful investment, but they require proper maintenance to retain their elegance and durability. While daily cleaning can handle minor dirt and spills, professional cleaning ensures your tiles receive the deep care they need. From removing tough stains to sealing the stone for long-term protection, professionals provide comprehensive solutions to keep your limestone flawless. With services like the Best Tile Cleaning Service, your limestone will continue to shine and enhance your space for years to come.

Published on: January 31, 2025

Natural granite tiles are a timeless and elegant addition to any home or commercial space. Their durability, beauty, and ability to resist wear make them a popular choice. However, like any natural stone, granite can be prone to staining if not properly maintained. Whether it’s an oil spill, coffee mark, or water stain, addressing the issue promptly and effectively is essential to restore your granite’s pristine appearance.

Why Granite Gets Stained

Granite is a porous material, meaning it can absorb liquids and oils if not sealed or maintained correctly. Stains can occur due to:

  • Oil-Based Spills: Cooking oils, grease, or cosmetic products.
  • Water Spots: Hard water deposits or lingering moisture.
  • Organic Stains: Coffee, tea, wine, or food spills.
  • Rust Stains: Metal objects left on the surface.
  • Etching: Damage caused by acidic substances like lemon juice or vinegar.

Understanding the cause of the stain is crucial in selecting the right cleaning method.

Tools and Materials You’ll Need

To effectively clean and remove stains from granite tiles, gather these tools and materials:

  • Mild Dish Soap: For regular cleaning.
  • Baking Soda: A gentle abrasive for stain removal.
  • Hydrogen Peroxide: For organic stains.
  • Acetone: For oil-based stains.
  • Poultice Powder: Specifically designed for granite.
  • Soft Microfiber Cloths: For cleaning and drying.
  • Plastic Scraper: To lift dried-on stains.
  • Sealer: To protect the granite after cleaning.

Step-by-Step Guide to Remove Stains from Granite Tiles

1. Identify the Stain Type

  • Determine whether the stain is oil-based, water-based, organic, or caused by rust. This will help you choose the right cleaning method.

2. Clean the Surface

  • Start by wiping the area with a soft cloth dampened in warm water and mild dish soap.
  • Remove any surface dirt or residue before treating the stain.

3. Apply a Poultice for Tough Stains

  • For stubborn stains, mix baking soda and water (for oil-based stains) or baking soda and hydrogen peroxide (for organic stains) to create a paste.
  • Spread the paste over the stain, cover it with plastic wrap, and tape down the edges.
  • Let it sit for 24-48 hours to draw out the stain.
  • Remove the poultice and rinse with warm water.

4. Use Acetone for Oil-Based Stains

  • Dab a small amount of acetone on a clean cloth and gently rub the stained area.
  • Wipe the area with a damp cloth to remove any residue.

5. Tackle Rust Stains with Specialized Cleaners

  • Use a granite-safe rust remover to treat rust stains.
  • Follow the product instructions carefully, and avoid using acidic cleaners that can damage the stone.

6. Address Water Stains

  • Mix equal parts water and white vinegar and lightly spray the stained area. (Test in a small, inconspicuous area first.)
  • Wipe with a clean microfiber cloth, and buff dry to remove any streaks.

7. Rinse Thoroughly

  • After treating the stain, rinse the area with clean water to remove any cleaning solution or residue.

8. Dry and Buff

  • Use a soft, dry cloth to remove excess moisture and buff the granite to restore its shine.

9. Seal the Granite

  • Apply a granite sealer to protect the surface from future stains.
  • Sealing creates a barrier that repels liquids and minimizes absorption.

10. Routine Maintenance

  • Clean granite tiles regularly with a pH-neutral cleaner to prevent dirt and stains from settling.

Tips to Prevent Stains on Granite Tiles

  1. Wipe Spills Immediately
    • Quickly clean up any spills to prevent them from soaking into the stone.
  2. Use Coasters and Trays
    • Place coasters under glasses and trays for items like oils and sauces to minimize contact with the granite surface.
  3. Seal Granite Regularly
    • Reapply a granite sealer every 6–12 months, depending on usage, to maintain its protective barrier.
  4. Avoid Harsh Cleaners
    • Stay away from acidic or abrasive cleaners that can damage the stone.
  5. Use Soft Materials
    • Clean with microfiber cloths or soft brushes to avoid scratches.

Why Professional Tile Cleaning Is Important

While DIY methods work for most stains, professional tile cleaning ensures your granite remains spotless and protected. Professionals use advanced tools and products to:

  • Deep Clean: Remove embedded dirt and tough stains.
  • Restore Shine: Bring back the granite’s natural luster.
  • Protect the Surface: Apply high-quality sealants for long-lasting protection.

For stubborn stains or extensive cleaning, consult Tile Cleaning Services in Canberra for expert care.

Conclusion

Granite tiles are a stunning addition to any space, but they require proper maintenance to retain their beauty. By following these simple steps and taking preventive measures, you can effectively remove stains and keep your granite tiles looking flawless. For deep cleaning and long-term protection, professional tile cleaning services like Tile Cleaning Services are an excellent option. With the right care, your granite tiles will remain a durable and elegant feature in your home for years to come.

Published on: January 31, 2025

Stone tiles are a luxurious and durable option for floors, walls, and countertops. Their natural beauty and timeless appeal make them a popular choice for both residential and commercial spaces. However, maintaining their shine and cleanliness requires proper care and attention. Dirt, stains, and grime can easily build up on stone tiles, diminishing their elegance and longevity.

Why Stone Tile Cleaning Is Essential

Stone tiles are porous and can absorb dirt, liquids, and oils, leading to stains and discoloration over time. Proper cleaning not only keeps them looking beautiful but also:

  • Preserves Durability: Prevents cracks, chips, and other damage caused by dirt build-up.
  • Maintains Shine: Keeps the surface polished and reflective.
  • Enhances Hygiene: Removes bacteria and grime, making your home or workspace healthier.
  • Extends Lifespan: Routine cleaning protects the stone’s integrity, ensuring long-lasting beauty.

Tools and Materials You’ll Need

Before diving into the cleaning process, gather the following tools and materials:

  • Soft-Bristle Brush: For scrubbing dirt and stains gently.
  • Microfiber Mop or Cloth: To avoid scratches during cleaning.
  • Mild pH-Neutral Cleaner: Designed specifically for natural stone tiles.
  • Baking Soda: For tackling tough stains.
  • White Vinegar: Only for non-sensitive stones like granite (test before use).
  • Bucket and Warm Water: For preparing cleaning solutions.
  • Sealant: To protect stone tiles after cleaning.

Essential Steps for Cleaning Stone Tiles

1. Remove Loose Dirt and Debris

  • Use a vacuum cleaner with a soft brush attachment or a broom to sweep away loose dirt and debris.
  • Pay attention to corners, grout lines, and crevices where dirt tends to accumulate.

2. Prepare a Cleaning Solution

  • Mix a small amount of a pH-neutral cleaner with warm water in a bucket.
  • Avoid acidic or harsh cleaners like bleach or ammonia, as they can damage the stone’s surface.

3. Mop or Wipe the Surface

  • Dip a microfiber mop or cloth into the cleaning solution, wring out excess water, and gently clean the tiles.
  • For walls or countertops, use a damp cloth to wipe down the surface.

4. Scrub Stains Gently

  • For stubborn stains, sprinkle baking soda over the affected area and add a few drops of water to create a paste.
  • Use a soft-bristle brush to scrub the stain gently, then rinse with clean water.

5. Rinse Thoroughly

  • Use clean water and a damp mop or cloth to rinse away any remaining cleaning solution.
  • Ensure no residue is left behind, as it can dull the tiles’ shine.

6. Dry the Surface

  • Use a dry microfiber cloth or towel to wipe the tiles completely dry.
  • This prevents water spots and streaks from forming.

7. Seal the Tiles

  • Apply a high-quality sealant to protect the stone tiles from stains, moisture, and dirt.
  • Reapply the sealant every 6–12 months, depending on the level of use.

8. Clean Grout Lines

  • Grout lines often collect dirt and stains over time, making them appear discolored.
  • Use a grout-specific cleaner or consider professional Grout and Tile Cleaning services to restore their original appearance.

Tips for Maintaining Stone Tiles

  1. Use Mats and Rugs
    • Place mats at entrances to reduce dirt and grit being tracked onto the tiles.
  2. Clean Spills Immediately
    • Promptly clean spills to prevent them from seeping into the porous stone surface and causing stains.
  3. Avoid Abrasive Tools
    • Use soft cloths or brushes instead of abrasive pads that can scratch the tiles.
  4. Regular Dusting
    • Dust or sweep your tiles regularly to prevent dirt from settling and causing long-term damage.
  5. Test Cleaners
    • Always test a small, inconspicuous area with any new cleaner to ensure it’s safe for your specific stone.

When to Call Professionals

While regular maintenance can keep your stone tiles clean, professional cleaning services are essential for deep cleaning and restoration. Experts have the tools and expertise to:

  • Remove tough stains and dirt build-up.
  • Restore the natural shine and polish of stone tiles.
  • Provide advanced treatments like sealing and polishing to protect your tiles.

For thorough care, consider hiring professionals specializing in Grout and Tile for long-lasting results.

Why Routine Tile Cleaning Is Important

  • Prevents Permanent Stains: Routine cleaning stops dirt and spills from becoming permanent marks.
  • Preserves Natural Beauty: Keeps your stone tiles looking polished and elegant.
  • Improves Safety: A clean, dry surface reduces the risk of slips and falls.

Conclusion

Stone tiles are a stunning and durable choice, but they require regular maintenance to retain their beauty and longevity. By following these essential cleaning steps and incorporating preventive care, you can ensure your tiles remain spotless and elegant for years. For deep cleaning and restoration, professional Stone Tile Cleaning Canberra services like Grout and Tile Cleaning are invaluable. With proper care, your stone tiles will continue to enhance your home or workspace with their timeless charm.

Published on: January 31, 2025

Limestone floors are a stunning addition to any home, exuding timeless elegance and natural beauty. However, keeping them polished and radiant requires specialized care. Limestone is a porous and delicate stone, meaning it’s prone to staining, dulling, and scratches over time. Proper polishing techniques can restore its shine and ensure its longevity.

Why Limestone Floors Need Polishing

Limestone, while durable, has a soft and porous surface that can:

  • Lose Shine Over Time: Daily wear and tear can dull its natural luster.
  • Absorb Stains: Without proper sealing, spills can seep into the stone.
  • Develop Scratches: Dirt and debris can cause small scratches that make the surface look uneven.

Polishing your limestone floors not only restores their shine but also protects them from further damage.

Tools and Materials You’ll Need

Before you begin polishing your limestone floors, gather the following materials:

  • pH-Neutral Cleaner: Safe for cleaning delicate limestone surfaces.
  • Soft Microfiber Mop or Cloth: To avoid scratching the stone.
  • Limestone Polishing Powder: Designed to restore the stone’s shine.
  • Polishing Pads or Discs: For mechanical polishing.
  • Water Spray Bottle: To mix with polishing powder.
  • Vacuum Cleaner or Broom: For removing dust and debris.
  • Sealer: To protect the stone after polishing.
  • Soft Towel or Buffing Pad: For the final touch.

Step-by-Step Guide to Polishing Limestone Floors

1. Clean the Surface Thoroughly

  • Start by vacuuming or sweeping the floor to remove loose dirt and debris.
  • Use a damp microfiber mop and a pH-neutral cleaner to wipe down the surface.
  • Let the floor dry completely before proceeding to the next step.

2. Inspect for Damage

  • Check for any cracks, deep scratches, or stains that may need special attention.
  • If you encounter severe stains or damage, consider consulting professionals for Emergency Tile Cleaning to ensure safe and effective restoration.

3. Apply Limestone Polishing Powder

  • Mix the polishing powder with water as per the product’s instructions.
  • Spread the mixture over the floor using a soft cloth or mop.

4. Polish with a Pad or Machine

  • Use a low-speed polishing machine with a soft pad or disc.
  • Move the machine in a circular motion, working on small sections at a time.
  • For manual polishing, use a soft cloth to buff the surface gently.

5. Rinse the Floor

  • After polishing, wipe the floor with a damp cloth or mop to remove any residue.
  • Ensure the surface is clean and free of polishing powder before sealing.

6. Seal the Limestone

  • Apply a high-quality limestone sealer to protect the surface from future stains and moisture.
  • Use a microfiber cloth to apply the sealer evenly, following the manufacturer’s instructions.

7. Buff for Extra Shine

  • Once the sealer has dried, buff the floor using a soft towel or buffing pad.
  • This step enhances the shine and gives the floor a polished, glossy finish.

Tips for Maintaining Polished Limestone Floors

  1. Sweep and Mop Regularly
    • Dust and mop your floors at least twice a week to prevent dirt and debris from causing scratches.
  2. Use Mats and Rugs
    • Place mats at entrances and rugs in high-traffic areas to minimize wear and tear.
  3. Clean Spills Immediately
    • Wipe up spills as soon as they occur to prevent stains from setting.
  4. Avoid Abrasive Cleaners
    • Stick to pH-neutral cleaners specifically designed for natural stone to avoid etching the surface.
  5. Reapply Sealant Annually
    • Reseal your limestone floors every 12 months to maintain their protective barrier.

Why Professional Tile Cleaning Matters

While DIY polishing techniques work well for regular maintenance, professional cleaning services are invaluable for:

  • Deep Cleaning: Removing stubborn stains and grime that DIY methods can’t tackle.
  • Restoration: Repairing scratches, cracks, or dull areas.
  • Long-Term Protection: Professionals apply high-grade sealants that enhance durability.

Services like Emergency Tile Cleaning are especially useful for urgent restoration needs, ensuring your limestone floors are quickly and effectively cared for.

Benefits of Polishing Limestone Floors

  • Enhances Appearance: Restores the stone’s natural shine and smooth texture.
  • Increases Durability: Protects the stone from wear and tear, extending its lifespan.
  • Improves Hygiene: Eliminates dirt, bacteria, and allergens trapped in the stone’s pores.
  • Adds Value: Well-maintained limestone floors elevate the aesthetic and market value of your property.

Conclusion

Polishing limestone floors is essential for maintaining their elegance and durability. With the right tools, products, and techniques, you can restore their natural shine and protect them from future damage. For deep cleaning, Tile Regrouting Canberra services can help enhance the overall look and longevity of your floors. Additionally, professional services like Emergency Tile Cleaning offer expertise and reliable results. With regular care and maintenance, your limestone floors will remain a timeless feature of your home.

Published on: January 31, 2025

Tile and grout maintenance is essential for keeping your floors and walls looking clean, polished, and durable. However, there are several misconceptions about how to care for tile and grout that can lead to improper cleaning practices or even long-term damage.

Myth 1: Regular Mopping is Enough to Keep Tiles and Grout Clean

The Reality: While mopping is an important part of routine cleaning, it’s not enough to keep your grout lines clean and free of stains.

Grout is porous, meaning it can absorb dirt, moisture, and grime over time. Mopping typically cleans the surface of tiles but can leave behind residue in the grout lines, which eventually leads to discoloration and staining. Over time, dirt builds up in the grout and creates an unsightly appearance that regular mopping simply cannot resolve.

The Fix:

  • Incorporate regular Tile Cleaning into your maintenance routine using specialized products or professional services.
  • Use a microfiber mop to reduce dirt streaks and prevent debris from settling into the grout.
  • Schedule professional grout cleaning to remove deeply embedded dirt and restore the original color of your grout lines.

Myth 2: Bleach is the Best Cleaner for Grout

The Reality: While bleach can whiten grout temporarily, it is not a long-term solution and may cause more harm than good.

Bleach is a harsh chemical that can damage grout by wearing down its sealant and making it more porous. This can lead to greater dirt absorption and increased vulnerability to stains. Additionally, bleach doesn’t kill mold at its root—it merely lightens the mold’s appearance on the surface, leaving it to return over time.

The Fix:

  • Avoid using bleach or other harsh chemicals for grout cleaning.
  • Opt for pH-neutral cleaners designed for tiles and grout, which are effective yet gentle.
  • For persistent stains or mold issues, hire professionals who specialize in Tile Stain Removal and grout cleaning for a safer and more thorough solution.

Myth 3: Grout Sealing is Optional

The Reality: Grout sealing is essential to protect your grout from stains, moisture, and dirt.

Unsealed grout is highly porous and easily absorbs liquids, leading to discoloration, mold, and bacteria buildup. Without a protective sealant, even minor spills can result in permanent stains. Many homeowners skip sealing grout because they assume their tiles and grout are naturally resistant to damage.

The Fix:

  • Always seal new grout after installation to prevent moisture and dirt absorption.
  • Reapply sealant every 1-2 years, depending on the level of foot traffic and exposure to moisture.
  • Consult a professional to ensure the correct type of sealant is used for your specific grout and tile.

Tips for Maintaining Tile and Grout

To keep your tile and grout looking clean and fresh, follow these simple tips:

  • Clean Spills Immediately: Wipe up spills as soon as they occur to prevent staining.
  • Use Door Mats: Place mats at entryways to reduce the amount of dirt and debris tracked onto tiled floors.
  • Ventilate Damp Areas: Use exhaust fans or open windows in bathrooms and kitchens to reduce moisture and prevent mold growth.
  • Sweep Regularly: Dust and dirt can act as abrasives on tiles, so sweeping daily can help prevent scratches and dullness.

Why Professional Tile Cleaning Matters

Even with diligent maintenance, dirt, stains, and mold can accumulate over time. Professional Tile Cleaning services provide the deep cleaning necessary to restore the original beauty of your tiles and grout. Professionals use specialized tools and cleaning solutions to:

  • Remove deeply embedded dirt and stains.
  • Eliminate mold and bacteria from grout lines.
  • Protect grout with high-quality sealants for long-lasting results.

Conclusion

Misconceptions about tile and grout maintenance can lead to improper care, leaving your surfaces vulnerable to stains, mold, and damage. Regular mopping, while important, is not enough, and harsh chemicals like bleach can cause long-term harm. Sealing your grout is not optional—it’s an essential step to ensure the longevity and cleanliness of your tiled surfaces. Tile Sealing Canberra services provide expert solutions to protect your tiles from moisture and stains, keeping them looking fresh and durable.

By understanding the facts and debunking these myths, you can keep your tile and grout looking their best for years to come. And when deeper cleaning is required, don’t hesitate to call in professional services that specialize in Tile Stain Removal for a spotless finish.

Published on: January 31, 2025

Maintaining the pristine condition of your home is a never-ending task, but one area that often gets overlooked is tile and grout cleaning. While it may seem like a manageable DIY project, there are compelling reasons to opt for professional tile & grout cleaning canberra services. In this comprehensive guide, we’ll delve into the top 6 reasons why choosing a professional for tile and grout cleaning is the right decision for your home. From saving time and effort to achieving a sparkling finish, let’s explore the top 6 reasons to choose professional tile cleaning services.

Expertise Matters

When it comes to tile and grout cleaning, expertise matters significantly. Professional cleaners are equipped with the knowledge and experience to tackle even the toughest stains and grime. Their familiarity with various tile types and cleaning techniques ensures that your tiles will be handled with care and precision.

State-of-the-Art Equipment

Professional cleaning services come armed with state-of-the-art equipment designed specifically for tile and grout cleaning. These advanced tools can penetrate deep into grout lines, effectively removing dirt and mold that household cleaners often can’t reach. The result is a thorough and long-lasting clean that rejuvenates your tiles.

State-of-the-Art Tile Cleaning Equipment

Time-Saving Solution

Tile and grout cleaning can be a time-consuming endeavor, especially for larger areas. Hiring professionals allows you to reclaim your valuable time. They work efficiently and swiftly, ensuring that your tiles are cleaned to perfection without eating up your weekends.

Preserving the Longevity of Your Tiles

Tiles are an investment in your home’s aesthetics and value. Professional cleaning not only restores their original shine but also extends their lifespan. By removing dirt and grime that can erode the surface over time, you’re safeguarding your investment.

Health Benefits

Dirty grout isn’t just unsightly; it can also harbor harmful bacteria and mold. Professional cleaning not only beautifies your home but also promotes a healthier living environment. Breathe easier knowing that your tiles and grout are free from allergens and contaminants.

Aesthetic Appeal

One of the most apparent benefits of professional tile and grout cleaning is the aesthetic transformation it brings to your home. The difference between before and after a professional cleaning is astonishing. Your tiles will gleam, and your grout lines will be restored to their original color, enhancing the overall beauty of your space.

Conclusion

So, these are the top 6 reasons to choose professional tile cleaning services. Choosing a professional for tile and grout cleaning is a wise decision that offers a multitude of benefits. From expertise and time savings to preserving your tiles and enhancing the aesthetics of your home, the advantages are undeniable. Don’t compromise on the cleanliness and longevity of your tiles – invest in professional cleaning services for a sparkling, healthy living space

Published on: September 16, 2023

Cleaning shower tiles can be a daunting task, especially when they accumulate grime, soap scum, and mold over time. However, maintaining a sparkling clean shower is crucial for both hygiene and aesthetics. In this comprehensive guide, we will explore the most effective methods for ultimate guide to cleaning shower tiles, ensuring your bathroom remains a pristine oasis. Say goodbye to those stubborn stains and hello to a revitalized shower- follow these ideas highly effective for tile cleaning Canberra needs!

Why Clean Shower Tiles Matter

Before delving into the cleaning methods, let’s understand why keeping your shower tiles clean is essential:

  • Hygiene Dirty tiles can harbor harmful bacteria and fungi, leading to health issues. Regular cleaning ensures a germ-free environment.
  • Aesthetics Clean tiles enhance the overall look of your bathroom, making it more inviting and comfortable.
  • Durability Proper maintenance prolongs the life of your tiles, saving you money on replacements.

Cleaning Shower Tiles

The Cleaning Arsenal

Before we start cleaning, let’s gather the necessary tools and materials:

1. Baking Soda

This versatile kitchen staple is a potent cleaner for tiles.

2. Vinegar

White vinegar’s acidity helps dissolve tough stains and mineral deposits.

3. Scrubbing Brush

A good-quality brush with nylon bristles is perfect for scrubbing grout lines.

4. Microfiber Cloth

These are gentle on tiles and leave no lint behind.

5. Hydrogen Peroxide

An effective mold and mildew remover.

6. Lemon Juice

Natural and effective against soap scum.

Step-by-Step Cleaning Process

Now, let’s dive into the step-by-step cleaning process:

  • Preparing the Shower Area Start by removing any shampoo bottles, soap, or accessories from the shower area. This ensures that you have easy access to all the tiles.
  • Dry Brushing Use a dry scrubbing brush to remove loose dirt and debris from the tiles. This will make the cleaning process more effective.
  • Making the Cleaning Paste Create a paste by mixing baking soda and water. The consistency should be thick enough to adhere to the tiles.
  • Applying the Paste Apply the baking soda paste to the tiles, focusing on areas with stubborn stains or discoloration. Let it sit for about 15 minutes.
  • Scrubbing Use your scrubbing brush to scrub the tiles vigorously. The baking soda will work its magic and start breaking down grime.
  • Rinsing Rinse the tiles with water thoroughly. Make sure no residue is left behind.

Tackling Mold and Mildew

For mold and mildew, mix hydrogen peroxide and water in equal parts. Apply this solution to affected areas and let it sit for 10 minutes before scrubbing.

Dealing with Soap Scum

Lemon juice is excellent for removing soap scum. Apply it to the affected areas and scrub gently.

Vinegar Rinse

To give your tiles extra shine, mix vinegar and water in a 1:1 ratio. Use this mixture as a final rinse.

Conclusion

Remember, a clean shower not only promotes hygiene but also contributes to a more pleasant bathroom experience. So, roll up your sleeves, gather your cleaning supplies, and enjoy a sparkling, rejuvenated shower.

Published on: September 9, 2023

Tiles and grout are popular choices for flooring and surfaces due to their durability and aesthetic appeal. However, over time, these surfaces can accumulate dirt, grime, and stains, diminishing their original allure. Regular cleaning is essential to maintain the beauty and hygiene of tiles and grout. While some homeowners may opt for DIY cleaning methods, there are undeniable advantages to choosing professional tile and grout cleaning services. In this blog, we will explore the key benefits of seeking professional assistance for tile and grout cleaning. Before that, know the importance of clean tiles and grout. You must carefully choose professional tile cleaners for your needs.

The Importance of Clean Tiles and Grout

Clean tiles and grout not only enhance the visual appeal of a space but also contribute to a healthier living environment. Tiles with embedded dirt and grout lines harbouring bacteria can negatively impact indoor air quality, leading to respiratory issues and allergies. Additionally, discoloured grout can make an otherwise pristine space appear unkempt.

DIY Cleaning vs. Professional Tile and Grout Cleaning

Pros and Cons of DIY Cleaning

DIY cleaning methods often involve using off-the-shelf cleaning agents and tools. While this may seem cost-effective, it comes with potential drawbacks. Homeowners might not have access to commercial-grade equipment and specialized cleaning solutions, making it challenging to achieve deep and thorough cleaning results. Moreover, improper techniques can lead to damage to tiles and grout.

Advantages of Professional Tile and Grout Cleaning

Professional tile and grout cleaning companies employ trained technicians equipped with state-of-the-art equipment and eco-friendly cleaning solutions. Their expertise allows them to tackle tough stains and embedded dirt effectively. By opting for professional cleaning, homeowners can enjoy restored tiles and grout without the risk of damage.

Professional Tile and Grout Cleaning

Understanding the Tile and Grout Cleaning Process

To appreciate the benefits of professional cleaning, let’s delve into the typical cleaning process:

  • Inspection and Preparing the Area Before commencing the cleaning process, technicians inspect the tiles and grout to identify specific problem areas. They also prepare the surrounding areas to ensure no damage occurs during the cleaning.
  • Specialized Cleaning Solutions Professional cleaners use specialized cleaning agents designed to break down dirt and grime without causing harm to the tiles or grout. These solutions are eco-friendly and safe for household use.
  • High-Pressure Cleaning and Extraction High-pressure cleaning and extraction equipment are employed to agitate and dislodge stubborn dirt and stains from the tiles and grout. The powerful extraction process ensures that all debris is removed effectively.
  • Sealing and Protecting Grout Lines Once the cleaning is complete, technicians may recommend sealing the grout lines to provide an added layer of protection against future staining and dirt accumulation.

Benefits of Opting for Professional Tile and Grout Cleaning

  • Superior Cleaning Results Professional cleaning services deliver outstanding results that surpass what DIY methods can achieve. The combination of advanced equipment and cleaning solutions ensures that tiles and grout are restored to their original state, bringing back their shine and cleanliness.
  • Prolonging Tile Life Regular professional cleaning can extend the lifespan of tiles and grout. Removing accumulated dirt and stains prevents premature wear and tear, preserving the tiles’ integrity and avoiding costly replacements.
  • Eliminating Harmful Bacteria and Mold Professionals effectively eliminate harmful bacteria and mold that can thrive in dirty grout lines. This not only enhances the hygiene of the space but also contributes to a healthier living environment.
  • Saving Time and Effort Cleaning tiles and grout can be a time-consuming and labour-intensive task, especially for larger areas. By hiring professionals, homeowners can save valuable time and effort while achieving superior cleaning results.
  • Enhancing Indoor Air Quality Clean tiles and grout contribute to better indoor air quality by reducing allergens and irritants that can be trapped in dirty grout lines. This is especially beneficial for individuals with respiratory conditions.

The Cost of Professional Tile and Grout Cleaning

Factors Affecting the Cost

The cost of professional cleaning services varies based on factors such as the size of the area to be cleaned, the severity of the stains, and the type of tiles and grout involved.

Return on Investment

While professional cleaning may involve an initial cost, it offers a significant return on investment in terms of restored aesthetics, prolonged tile life, and improved indoor air quality.

Choosing the Right Tile and Grout Cleaning Service

To ensure a satisfactory cleaning experience, it’s crucial to select the right tile and grout cleaning service. Consider the following factors:

  • Experience and Expertise Look for companies with years of experience in the industry and skilled technicians who know how to handle different types of tiles and grout.
  • Reviews and Testimonials Check online reviews and testimonials from previous customers to gauge the quality of service and customer satisfaction.
  • Eco-Friendly Practices Choose companies that prioritize eco-friendly cleaning solutions to minimize environmental impact.
  • Customer Service Excellent customer service, including responsiveness and clear communication, is an important aspect of a satisfactory cleaning experience.

Maintaining Clean Tiles and Grout

To prolong the effects of professional cleaning, homeowners should adopt simple maintenance practices:

Regular Cleaning Tips

  • Sweep or vacuum tiles regularly to remove loose dirt and debris.
  • Wipe spills and stains promptly to prevent them from setting in.
  • Use mild, pH-neutral cleaning agents for routine cleaning.

Protective Measures

  • Place doormats at entrances to minimize dirt and moisture from being tracked onto tiles.
  • Use felt pads on furniture legs to prevent scratches on the tiles.

Conclusion

Opting for professional tile and grout cleaning offers numerous advantages over DIY methods. From superior cleaning results to improved indoor air quality, homeowners can enjoy a fresh and hygienic living space with the help of trained technicians and specialized equipment.

Published on: July 31, 2023

Black mould is just gross and filthy. Such black discolourations in your bathroom are just unsightly and disgusting. You do not even know that these can be equally dangerous too. If you see black stains and discolourations in your bathroom, then it is definitely a back mould. Black moulds are scientifically known as stachybotrys chartarum. These can be caused in bathroom tiles due to excess humidity, wetness and moisture, and improper ventilation. Black moulds can easily take up their place in bathrooms with these features and thrive there. 

Remove Black Mould from Bathroom Grout

The right environment for the moulds attracts them to grow. Moulds are of several types and many of them can grow in such an environment. Removing moulds, that too from bathroom tiles can be tiring but it is very important to avoid illnesses and allergies caused by moulds. Today, you will get to know how to deal with such black moulds that grow in your bathroom.

Tips to Remove Black Mould from Bathroom Grout:

  • Removal of the mould from grout- First and foremost it is necessary to remove black mould from bathroom grout and then look after other precautions. There are many types of cleaning agents that are available in the market for removing moulds. You can even use an antifungal surface cleaner for this. Use a sponge to clean cloth to wipe off the moulds. Now, scrub the grout and tiles if any stubborn areas still have mould then rinse them thoroughly. 
  • Get rid of mould stains- After the removal of moulds, there can still be mould stains remaining on your grout. For removing these stains, make a solution of equal parts of bleach and water. Put it on all the black stains and leave it for about 10-12 minutes. After that, put the solution again and scrub it using an old toothbrush.
  • Remove the mould spores- It happens many times that after the removal of mould, mould spores remain on the tiles. The bleach used in the above step can get rid of mould spores but only to a certain extent. So, use vinegar on the area and let it dry. With this, all the mould spores will get finished.
  • Prevention of further black moulds- Black moulds can occur again because of the dark and damp conditions of a bathroom. So, follow this bathroom cleaning Canberra tips to prevent the black mould from growing in your bathroom again.
    • Keep a bottle of vinegar in your bathroom. Spray this often for black mould prevention. You can add a few drops of essential oils to avoid the smell of vinegar.
    • Install an exhaust fan, this will help to reduce the humidity in your bathroom. Running an exhaust fan whenever you take a bath will remove the steam from the inside.
    • Always wipe and clean the glass doors and windows of your bathroom. This gets rid of the excess moisture from your bathroom. While you are at it, wipe off the sinks as well. 
    • Clean your bathroom thoroughly every week to avoid the formation of moulds. 

Other Methods to Get Rid of Moulds in General from Your Bathroom

  • Regular chlorine bleach- Bleach, especially regular chlorine bleach works best to get rid of the mould from white tiles. Ensure you avoid the usage of bleach on coloured tiles as it can cause discolouration of the tiles.
  • White vinegar distilled- We know that white vinegar is a natural cleaning agent and it can even saturate your moulds. Let the white vinegar sit on the moulds for half an hour and scrub it off. Rinse it at last.
  • Baking soda- Make a paste of baking soda and apply it to the moulds. Within 10 minutes, the baking soda will lift the mould and you can scrub it afterwards. Rinse it as usual after the process.
  • Hydrogen peroxide- Once you apply baking soda paste, slowly pour or spray hydrogen peroxide over the moulds. It will fizz up and loosen the mould. Now, you can use a stiff brush to scrub off the fizz along with which the mould will also get off. Rinse and clean the remaining remnants.

Do You Need Local Experts For Tile And Cleaning?

Our agency Tims Tile and Grout Cleaning Canberra is one of the top-listed Professional Floor Cleaning companies in Canberra. For years, we have been serving excellent services to all our clients. We know all the tips and tricks of tile and grout cleaning. You need not worry about anything once you book our tile & grout cleaning services in Canberra. So, get a booking for yourself and rest assured that everything will be taken care of by our professionals.

Published on: July 10, 2023

Last updated on: July 29, 2023

Many things contribute to dirty tiles and grout. You must know what the reasons are so that you can follow the preventive principles too. If you want to have sparkling tiles then tile and grout cleaning by natural methods will be an important thing. Here are some of the methods that you need to understand How To Clean Tile And Grout By Using Natural Methods At Home?

Tile And Grout
Tile And Grout

Scrub the Tile and Grout With Baking Soda and a Scrubber

If you want to get rid of the sticky tiles then you must use baking soda for the same. Take some baking soda in the scrubber and start scrubbing the area that has too much mold and stickiness. So, you will see that this will prove to be a successful method.

You Can Also Use Hydrogen Peroxide and Baking Soda Mix

You must mix baking soda and hydrogen peroxide for better results. This will ensure that the grime and the mold will quickly get off. Such home remedies are a boon when you are looking forward to having clean and nice tiles.

Use the Mix of Liquid Detergent and Rubbing Alcohol

If you can mix rubbing alcohol and liquid detergent in equal parts and make this a natural cleaner for dirt over tiles and grout then it can bring in better results. You must mix these two things in a spray bottle and add some water to it. Now, spray this on the tile dirt and then use the mop to remove the dirt. These things will help you in clearing off the dirt on tiles and make them nice and amazing.

Clean the Grime and Bacteria on Tiles With a Salt Scrub

If you wish to enhance the look and hygiene of the tiles then you should clean them with a salt scrub. With this tile and grout cleaning by natural methods, you are making the area bacteria and germ-proof.

Lemon Juice and Mouthwash Mix

You should mix lemon juice and mouthwash mix in equal parts and then use a sponge to apply this to the dirty tiles and grout. Then rub the sponge against the same. You will see that you will get the best results with this remedy.

Ideally, if you want to maintain complete hygiene in your home then it is better to call for the professionals who will clean the tile and grout thoroughly. But, if you are confident enough and think that you can use various home remedies for the same successfully then get ahead and try the above methods.

Conclusion: 

All the above methods work well against grime that stays on tiles and grout. Make sure that you know what all options work well for you so that there would be no issues at all. Clean tiles would be appealing and would enhance the look of the area. So, be ready to get the relevant solutions. In this blog we suggest How To Clean Tile And Grout By Using Natural Methods At Home?

Published on: July 10, 2023

Last updated on: July 31, 2023